A data disaster recovery plan is more than a data backup. It is what you set up before a problem occurs with your data so you can get back to how things were asap. A backup strategy is an important step. It is not the only step, but it’s a good place to start. Below is walk-through of how to use a free program to backup your data. Before we begin with this tutorial, you’ll need these things:
- A Windows PC – This tutorial is for PCs running Windows only. It cannot help you backup MAC/iOS, Linux, or mobile devices.
- An external drive – You need one that is at least as large as the drive you are backing up. Click here if you need advice on purchasing one.
This tutorial will walk through the following tasks to help you backup your files:
- Making a manual backup of the folder you will set up to automatically back up
- Downloading and installing SyncBackFree from 2BrightSparks
- Setting up SyncBack to backup a folder
- Verifying your backup
- Scheduling automated backups
- Securing your backup drive
Safety First
Get your external drive and make sure it has adequate space. A good rule of thumb is to have at least as much free space on your external drive as the capacity of the computer drive you want to back up. However, if you just want to back up a folder (or more) that is not very large, then you only need triple the amount of space as the source files (source is what’s on your computer) on your destination (destination is your external drive).
For example, if your computer has two folders you want to backup, and one is 42 MB in size and the other is 244 MB in size, you can use a drive as small as 1 GB [(42+290) x 3 = 996]. As you know, 1,000 MB = 1 GB, and 1,000 GB = 1 TB. If you need to purchase an external drive, here’s some advice.
You need to have a copy of your files that are untouchable by the backup software while you get all the settings right. This is critically important because it is possible that a mistake on your end, or a mistake with the software could obliterate all the files in your source and destination. While this is unlikely, you need another backup just in case. Ideally you can make a manual backup of your files on a totally separate device than what you will setup for your SyncBack backups. To do this important and non-negotiable step:
- Decide which source folder, or folders you will be backing up.
- Make a new folder on your destination backup drive and call it something like, ‘Manual Backup’.
- Make a simple backup of the folder/s from your computer (source) to your external backup drive (destination) via copy and paste.
- Check that all the source files have copied over to the destination properly. Open some files to double check functionality.

Once you’ve completed this step you’re ready to start setting up your SyncBack backup.
Setting Up SyncBack

2BrightSparks makes great software. I’ve been using SyncBackPro for well over a decade for both personal and professional applications. For backing up files and folders, SyncBack is hard to beat.
This tutorial is for the free version of SyncBack. The pro version adds features that some people may need (myself included). However the free version is an excellent starting point.
Go to the 2BrightSparks website and download SyncBackFree. Double click the installer you downloaded. I let SyncBack install where it wants to, but you can change where it install if you want. Once the program launches you’ll see a screen similar to this:
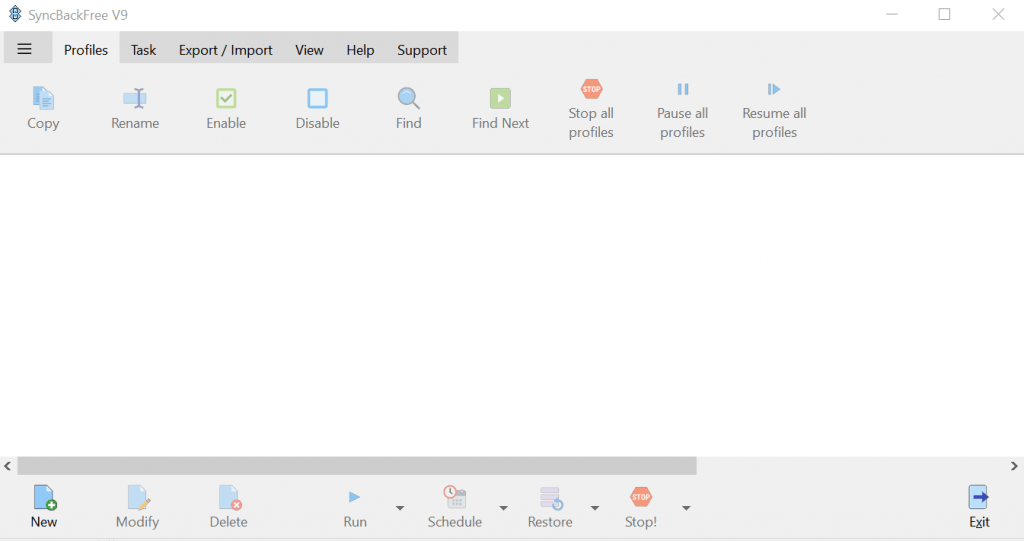
- Click the bottom left ‘New’ icon.
- Enter a name for this backup profile in the dialogue box. I’m calling mine ‘Document backup’.
- ‘Backup’ should already be selected, but if it isn’t, choose it and click next.
- Leave the source and destination (right and left side) as is, which should be ‘Internal/external drive, network path, etc.’ Do not check the box to compress files. Click Done.
- A window will pop up telling you that ‘the main profile setup window will now open’. Click OK.
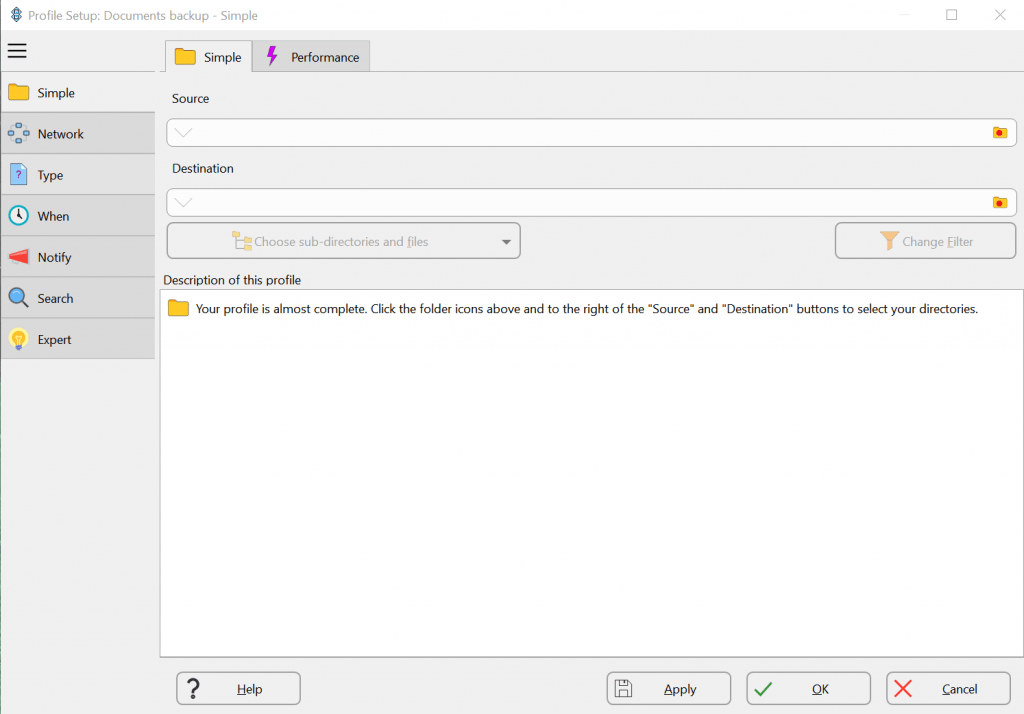
Now you’ll see a window similar to the image below. You need to choose the source folder (what you want backed up) and the destination folder (a folder on your external backup drive). To do this you need to click the folder icon on the far right. I put a red dot in the image below to show where to click to chose folders. If you haven’t made a folder on your external drive for your backups, do that now and select it as the destination.
Press OK if you’ve double checked that the manual backup you made is a working copy of the files you will be backing up through SyncBack. Once you press OK you will see a window pop up that asks if you want to do a simulated backup run. It’s a good idea to do this because you will get an overview of which files are being backed up, and whether or not files are being deleted. Click Yes. After a little while you’ll see a screen similar to this:
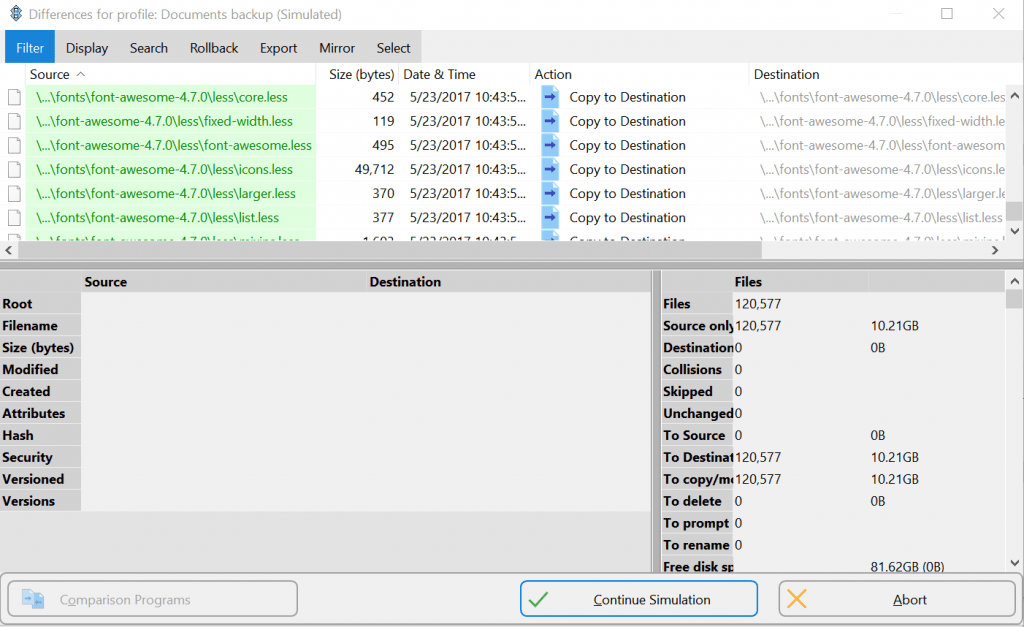
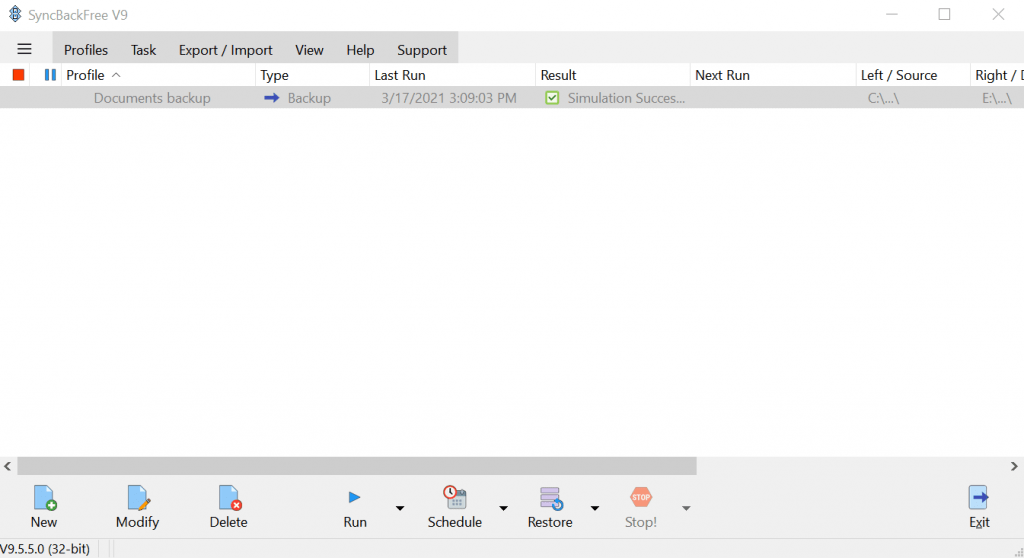
Click the ‘Continue Simulation’ button. When the simulation is done, you should see a screen similar to the one below if it all went well:
Click the Run button at the bottom of the screen (looks like a play button triangle). Shortly you should see a screen that lists all the files that will be copied to the destination. Green highlighted folders = good, yellow or red = make sure the program is handling these files correctly. Hopefully all the files will be highlighted green at this point. Click the ‘Continue Run’ button at the bottom of the screen.
TIP: You can click the triangle at the right of the ‘Continue Run’ button and choose for this ‘Differences’ screen to not show again. Once you have verified the backup is working (more on verification below) you can choose that option to have the program run more transparently.
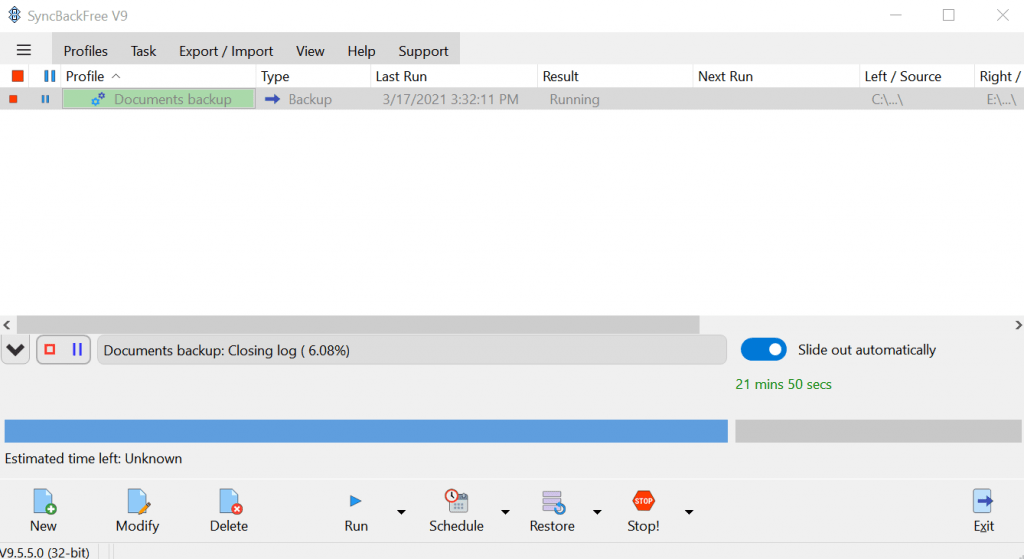
Once you click ‘Continue Run’, the screen may disappear. This is OK! It is running in your taskbar. Look for it and click on it to see how the backup progress. Depending on the size of the folder you are backing up, it might take a while the the backup to complete. While it is backing up the screen will look something like this if you click on the SyncBack icon in your taskbar:
Once the backup is complete, navigate to the backup folder (the SyncBack destination folder, not the manual backup folder you made) and make sure the files match with those on your computer. Try to open some up and make sure they work as expected. If it looks like all your files have been copied over properly…
Congratulations!
You’ve made your first backup with SyncBack Free. Now it’s time to set up a schedule to automate this process. Click on the ‘Schedule’ button at the bottom of the screen (looks like a calendar).
Verifying your Backup
Setting up an automated backup won’t help you if something goes wrong and you didn’t notice that your backup files are incomplete, corrupt, or you otherwise can’t get your data back from the backup. There’s dozens of reasons why things go wrong, and they will at some point. You have to routinely verify that your backup files, on the external drive, are complete and usable. Set a calendar reminder for yourself to do a quick comparison of the number of files in the source and destination folder are the same, and check some random files in the backup to ensure they aren’t corrupt. This is just as important as making the backup in the first place! Don’t skip this step! Don’t forget. Find a way to do this routinely and make it a habit.
It’s also a good idea to routinely make manual backups of your files as you did in the very first step of this tutorial. Having another backup that a piece of software (SyncBack in our case) isn’t trying to modify can be a lifesaver if the universe conspires against you and tries to destroy your data.
Scheduling Backups
While you could run the backups manually from the SyncBack software main screen (shown below in a blue box), setting up a schedule keeps your backups routine. On the SyncBack main screen, click the Schedule button (shown below in a green box)

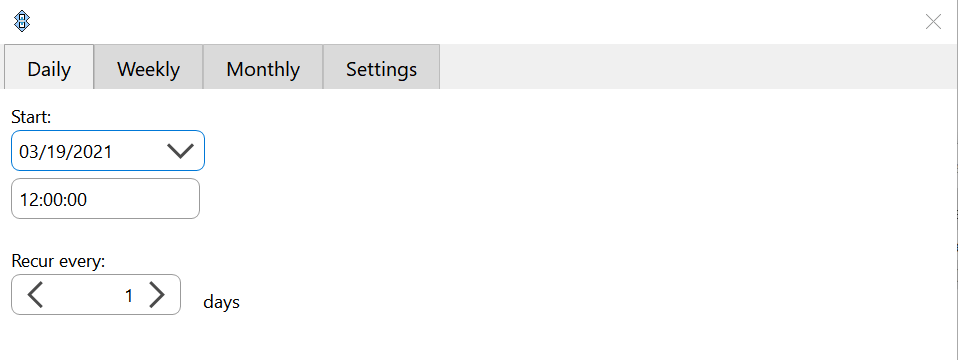
A dialogue will pop up telling you there is no schedule for the profile you just made. Click Yes to create a schedule. If you are asked for your Windows password, enter that (it’s the password you enter when you computer starts up). A new window will pop up. You can set whatever schedule you want. Here’s a setting that I find useful. On the daily tab, I set it to recur every day at noon (I’m often having lunch then).
Then on the Setting tab I usually have it set as shown below:
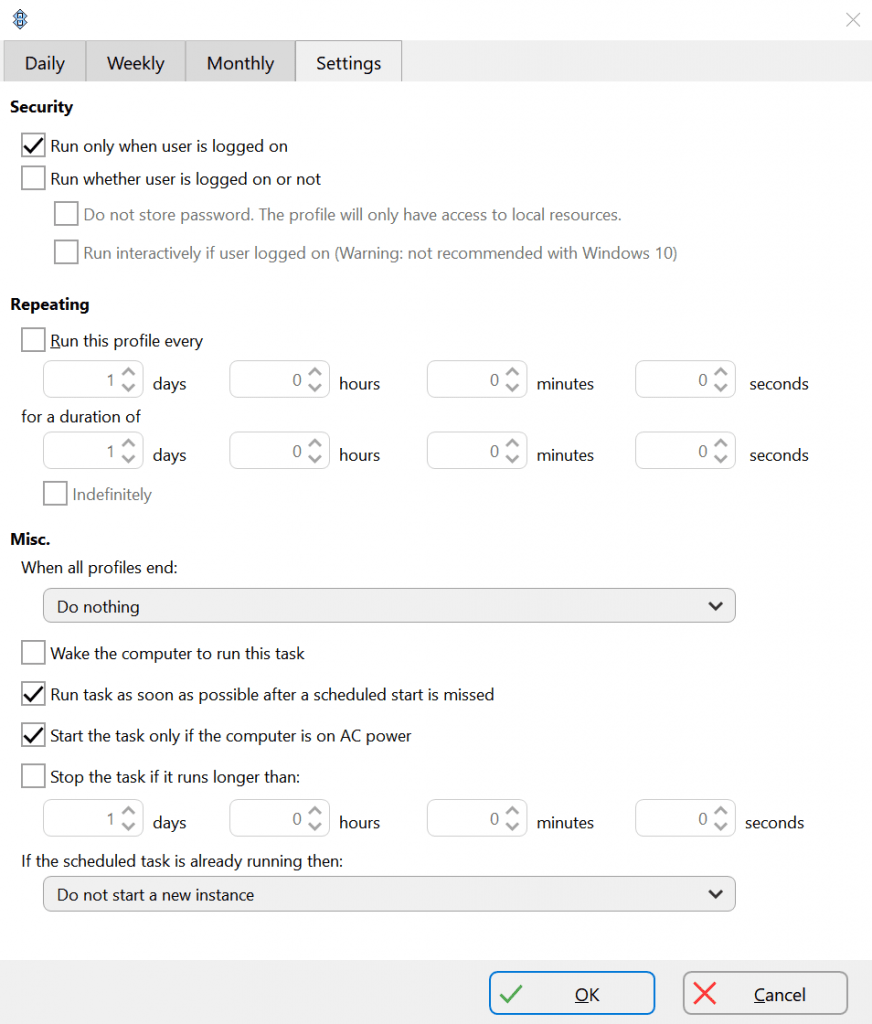
Decide what schedule works best for how you work and give it a try. Once you click OK on this window, another window will appear that summarizes your schedule. If it looks good, click OK on that as well, or click the ‘Edit Schedule’ button to go back and make changes.
Now that you have a schedule set you should have an easier time deciding when to verify your backups.
Securing your Backup
The files on your external backup drive may not be encrypted (it depends on the backup drive and if it has that capability, and if you set it up that way). If the files are encrypted on your computer and they are not encrypted on your backup drive, you may want to take extra precautions to ensure the files on the backup drive stay within your control.
As a practice I do not travel with my backup drive – it’s too easy to lose. I keep the drive in a place that is out of the way and won’t ‘walk-off’ (kids can’t reach it, dog can’t snag it, and van de graaff generators are nearby).
USB Drive Advice
- Get an external drive with at least as much capacity as the drive(s) you are backing up. I tend to get drives much larger than my computer drive’s capacity and keep multiple backups going back in time. It’s up to you to decide how much space you need.
- Get an SSD drive with a fast USB 3.0+ or USB-C connection.
- Stick to a name brand with good reviews (this is not the place to quibble over a few dollars – get a good one and be done with it). Samsung, SanDisk, and Seagate are all good choices.
Here’s an example: You have a laptop with two internal drives in it, one that is 500GB and one that is 1TB. These drives are 75% and 42% filled with data respectively. You want to keep multiple backups: some made manually and some automated. Plus you might want to backup the entire system someday. My advice is you need at least a 1.5TB external drive so you can back up everything on both of those drives now, and have space for manual backups, redundant backups and maybe even enought space for a whole system backup (maybe not for a whole system, which isn’t covered in this tutorial, and I would recommend being put on a different external drive anyway). Regardless, having extra space is always nice and it can make your drive operate faster.
File vs System Backup
Consider SyncBack a surgical tool. It is excellent for making backups of folders. I also use SyncBack Pro for more advanced tasks beyond simple backups such as mirroring, versioning, incremental backups, and FTP archiving. If you need some of these advanced options then check out the pro version.
SyncBack Free or Pro is not my choice for whole-computer system backup, for that I use Macrium Reflect. Reflect is a sledgehammer. It backups your entire system, provides rescue disc creation, pre-boot security, ransomware protection, and even bit-by-bit bare metal backups to a variety of media. There is a free version of Macrium. It can be useful if you need to clone a drive as a one-off occurrence, or if you want to manually make a total copy of your computer. However, there are so many more features in the paid version of Macrium, and it works so darn well, I think spending money on the home version is worth every penny, and then some.
There are other tools on the market that claim to do both file and system backup equally well. I’m sure this magical unicorn exists somewhere, I just haven’t found it yet.
When Problems Occur
If you have logging turned on (it is by default) SyncBack will monitor the progress of a task. If it encounters a problem, it will open a web browser page and display the log. A typical error log looks similar to this:
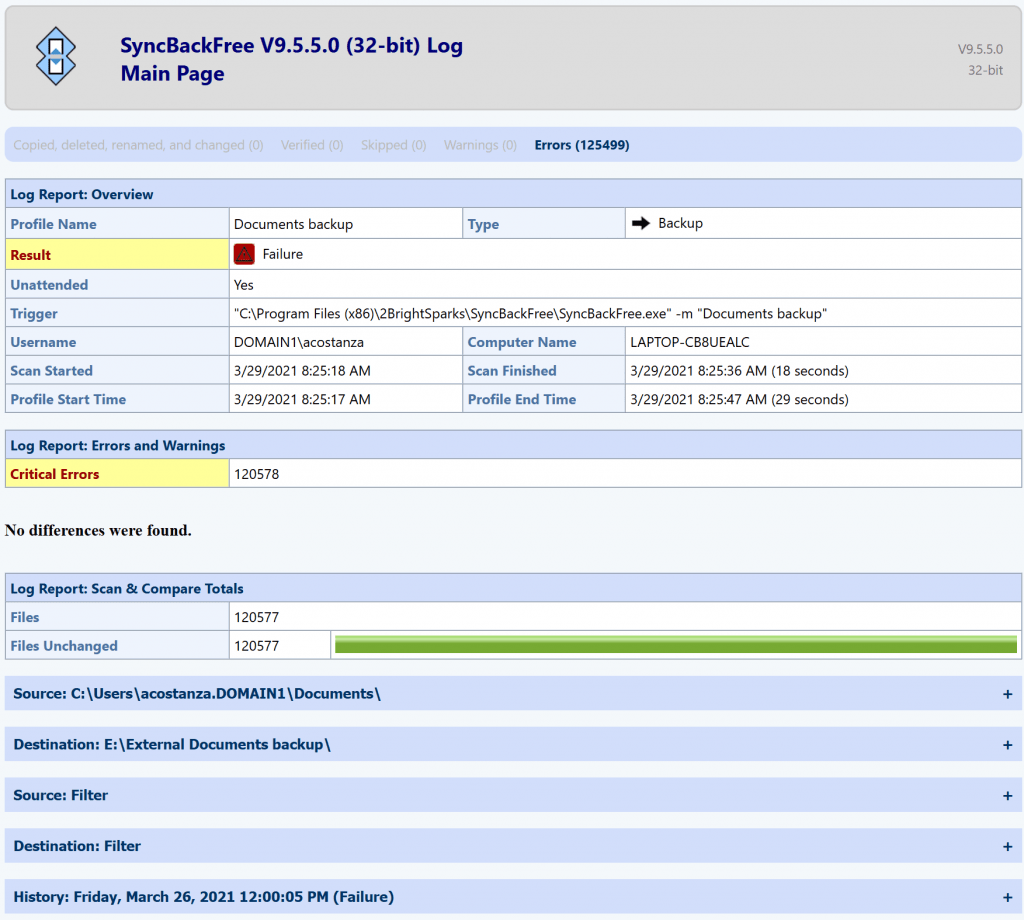
It looks terrifying, but errors are easy to fix once you read through and identify the problem. We can see right away that the result of the backup was a failure. No backup was made in this run at 8:25 AM on 3/29/2021. Ok, no problem, we can fix this!
Click on the ‘Errors’ in the top section, under the SyncBackFree logo banner. You’ll see something similar to this:
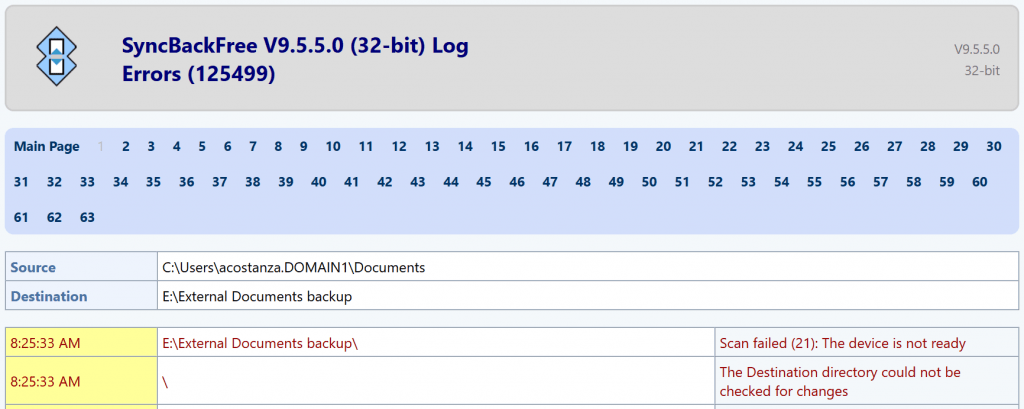
I have 125,499 errors. Terrifying right? Actually, not at all. We see right away that the problem is that the external drive (backup target) could not be found. Rather than just give that one error, SyncBack logged every file it could not backup. In this instance there was a power outage and my backup drive turned off. In this case the fix is simple. I turned on my backup drive.
You may encounter other errors. For example, if you were working on a file and it was open when a backup run started, it may not have been able to copy it to the destination. You’ll get an error for that. Some errors cause a backup failure, and some are just warnings. Read through the error log until you identify the problem. Maybe you’ll have to change the backup schedule to run when you aren’t working on files (middle of the night should work better for a backup run if you keep encountering issues with open files). The easiest thing to do is make some adjustments and just start a backup run over again. If you keep getting errors, keep making changes until you can execute a run with no critical errors. Then check the backup!